


Fireduino TFT 字符显示
更新时间:2017-08-08 阅读:14280
目录
Fireduino TFT
Fireduino TFT 采用与传统的Arduino TFT 同属一些列的LCD 驱动器,为ST7735S,与Fireduino 通过I8080 接口连接,比传统Arduino TFT 的SPI 方式 刷新速率快一个级别。
Fireduino TFT库
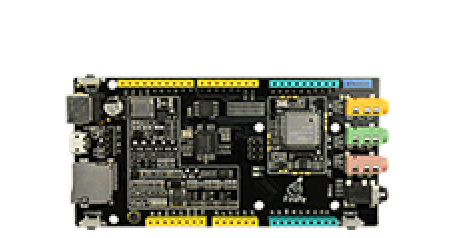
Fireduino TFT 库 基于ST7735S 驱动扩展 Adafruit GFX 而成的TFT库,Adafruit GFX负责绘制图形,ST7735S 负责驱动LCD 显示屏,它兼容 Adafruit GFX API,Fireduino 连接 TFT 后如下图:

Fireduino TFT 字符显示
本案例演示如何在Fireduino 的TFT配件上绘制文本,每隔一定时间循环读取Fireduino 的模拟输入口A0,并把其值显示在TFT 显示屏上。
硬件要求
1.Fireduino board
2.Fireduino TFT board
代码
开始之前
使用TFT 屏幕,首先得包含TFT库头文件。
#include <TFT.h>定义你的TFT 屏幕,并创建一个实例对象
TFT TFTscreen = TFT();
更新屏幕文本信息,你需要一个缓冲区
char sensorPrintout[4];
setup()
1.初始化屏幕
2.设置背景色
3.通过 stroke() 设置字体颜色
4.设置文本字符大小
5.往屏幕写入静态文本。
void setup() {
  // Put this line at the beginning of every sketch that uses the GLCD:
  delay(1);
  TFTscreen.begin();
  delay(1);
  // clear the screen with a black background
  TFTscreen.background(0, 0, 0);
  // write the static text to the screen
  // set the font color to white
  TFTscreen.stroke(255, 255, 255);
  // set the font size
  TFTscreen.setTextSize(1);
  // write the text to the top left corner of the screen
  TFTscreen.text("Sensor Value :\n ", 0, 0);
  // ste the font size very large for the loop
  TFTscreen.setTextSize(5);
}
loop()
1.读取来自外部输入电压后转换为字符串文本。
2.设置文本颜色并把文本写入屏幕。
3.延时后把刚才写入的文本清除。
void loop() {
  // Read the value of the sensor on A0
  String sensorVal = String(analogRead(A0));
  // convert the reading to a char array
  sensorVal.toCharArray(sensorPrintout, 4);
  // set the font color
  TFTscreen.stroke(255, 255, 255);
  // print the sensor value
  TFTscreen.text(sensorPrintout, 0, 20);
  // wait for a moment
  delay(250);
  // erase the text you just wrote
  TFTscreen.stroke(0, 0, 0);
  TFTscreen.text(sensorPrintout, 0, 20);
}
示例程序 -- TFT 字符显示
#include <TFT.h>  // Arduino LCD library
// create an instance of the library
TFT TFTscreen = TFT();
// char array to print to the screen
char sensorPrintout[4];
void setup() {
  // Put this line at the beginning of every sketch that uses the GLCD:
  delay(1);
  TFTscreen.begin();
  delay(1);
  // clear the screen with a black background
  TFTscreen.background(0, 0, 0);
  // write the static text to the screen
  // set the font color to white
  TFTscreen.stroke(255, 255, 255);
  // set the font size
  TFTscreen.setTextSize(1);
  // write the text to the top left corner of the screen
  TFTscreen.text("Sensor Value :\n ", 0, 0);
  // ste the font size very large for the loop
  TFTscreen.setTextSize(5);
}
void loop() {
  // Read the value of the sensor on A0
  String sensorVal = String(analogRead(A0));
  // convert the reading to a char array
  sensorVal.toCharArray(sensorPrintout, 4);
  // set the font color
  TFTscreen.stroke(255, 255, 255);
  // print the sensor value
  TFTscreen.text(sensorPrintout, 0, 20);
  // wait for a moment
  delay(250);
  // erase the text you just wrote
  TFTscreen.stroke(0, 0, 0);
  TFTscreen.text(sensorPrintout, 0, 20);
}