


编写Fireduino的第一个程序
更新时间:2017-08-08 阅读:14023
操作环境
以下为本教程的操作环境:
- 操作系统: Windows 7 旗舰版 64bit
- Arudino IDE: 1.6.8
- Fireduino SDK 1.0.3
- Fireduino 开发板驱动已经成功安装。
示例说明
本章节主要介绍了 Arduino IDE 中自带例程Blink如何在Fireduino中使用。
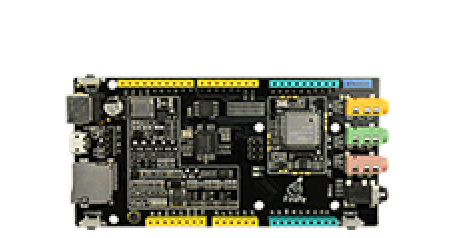
Fireduino 与 Arduino LED接口差异
Fireduino 提供了两个 LED 供用户使用,分别接在了数字引脚 3 ( LED 3 ) 和数字引脚 13 ( LED L ) 上,而 Arduino 则仅提供了一个 LED ( LED L ) ,并且接在了数字引脚 13 上。
Blink 流程简介
Blink 示例主要展示了如何将一个数字引脚模式设置为OUTPUT,并且让这个引脚先输出高电平,延时一秒之后再改为输出低电平,再延时一秒。如此无限循环。 当设置的数字引脚接在了LED上时,当该数字引脚输出高电平的时候,LED熄灭,当数字引脚输出低电平的时候,LED亮起。 所以Blink程序最终实现现象就是LED每一秒都改变一次亮/灭状态,形成闪烁灯。
操作步骤
按照以下步骤创建 Fireduino 第一个项目:
第一步: 依次点击 Arduino IDE 菜单栏 : 文件>>示例>>01.Basic>>Blink.
第二步: 依次点击 Arduino IDE 菜单栏 : 工具>>开发板管理器>>Fireduino。
第三步: 依次点击 Arduino IDE 菜单栏 : 工具>>端口>>Fireduino对应串口端口(板载USB转串口的端口号)
第四步: 先点击编译按钮,确认代码是否可以编译通过。如果编译通过,说明我们 Fireduino SDK 已经安装成功。

代码应如下:
/*
  Blink
  Turns on an LED on for one second, then off for one second, repeatedly.

  Most Arduinos have an on-board LED you can control. On the Uno and
  Leonardo, it is attached to digital pin 13. If you're unsure what
  pin the on-board LED is connected to on your Arduino model, check
  the documentation at http://www.arduino.cc

  This example code is in the public domain.

  modified 8 May 2014
  by Scott Fitzgerald
 */


// the setup function runs once when you press reset or power the board
void setup() {
  // initialize digital pin 13 as an output.
  pinMode(13, OUTPUT);
}

// the loop function runs over and over again forever
void loop() {
  digitalWrite(13, HIGH);   // turn the LED on (HIGH is the voltage level)
  delay(1000);              // wait for a second
  digitalWrite(13, LOW);    // turn the LED off by making the voltage LOW
  delay(1000);              // wait for a second
}
此时,我们已经完成了 Fireduino 的第一个项目创建与编译,不过我们仅仅改编了系统原有的示例,适配到了Fireduino开发板,并且编译了程序,我们并没有在开发板上面看到我们所设计的程序应该有的现象。这是因为我们在PC上用 Arduino IDE 所编译生成的固件程序,需要上传到Fireduino开发板后我们才能看到刚才设计的效果,否则固件只能存放在PC上,而不是 Fireduino 中。下一章我们介绍如何上传固件文件到Fireduino中。